LITTLE TUMBLE BABY QUILT & Block Tutorial
Hello! Thank you for taking the time to check out my blog post! I’m very excited to be participating in this Blog Hop, and we have @creatininthesticks to thank for this fun event! Be sure to check out the other blogs as well — we all worked very hard behind the scenes! There are so many talented makers participating in this blog hop and we all have something very cool to share! All the makers and their blogs can be found HERE.
Now, I would like to introduce to you the Little Tumble Baby Quilt! It’s a modern take on a very simple, square-block quilt. It was inspired by my youngest son while he was an infant learning how to roll over. He could roll side to side, but for a while, his long arms kept him from rolling completely over. This inspired the single curve in each block. This is the perfect quilt to try curved piecing for the first time, and I will show you two different ways to successfully get those curves put together!

The full pattern can be found HERE, or you can follow the tutorial for making an individual block below!
Piecing Curves with Pins
I promise, sewing curves is not as hard as it looks! It takes a little practice, but as long as you are comfortable using your sewing machine, you’ll get the hang of it pretty quickly.
The first method I’ll show you is pinning your curves. This is a very common method and works great. Here’s what you do:
- Cut out your pieces. Piece A will be a 9″ square and Piece B can be cut out of a scrap that is at least 4″x4″. You can use the template provided in the pattern in the pattern, OR make your own template! (A cereal bowl or pint glass work great.)
- Find the center of both pieces by folding both Pieces A and B in half. Use your finger to press and make a crease at the raw edge to mark the center.
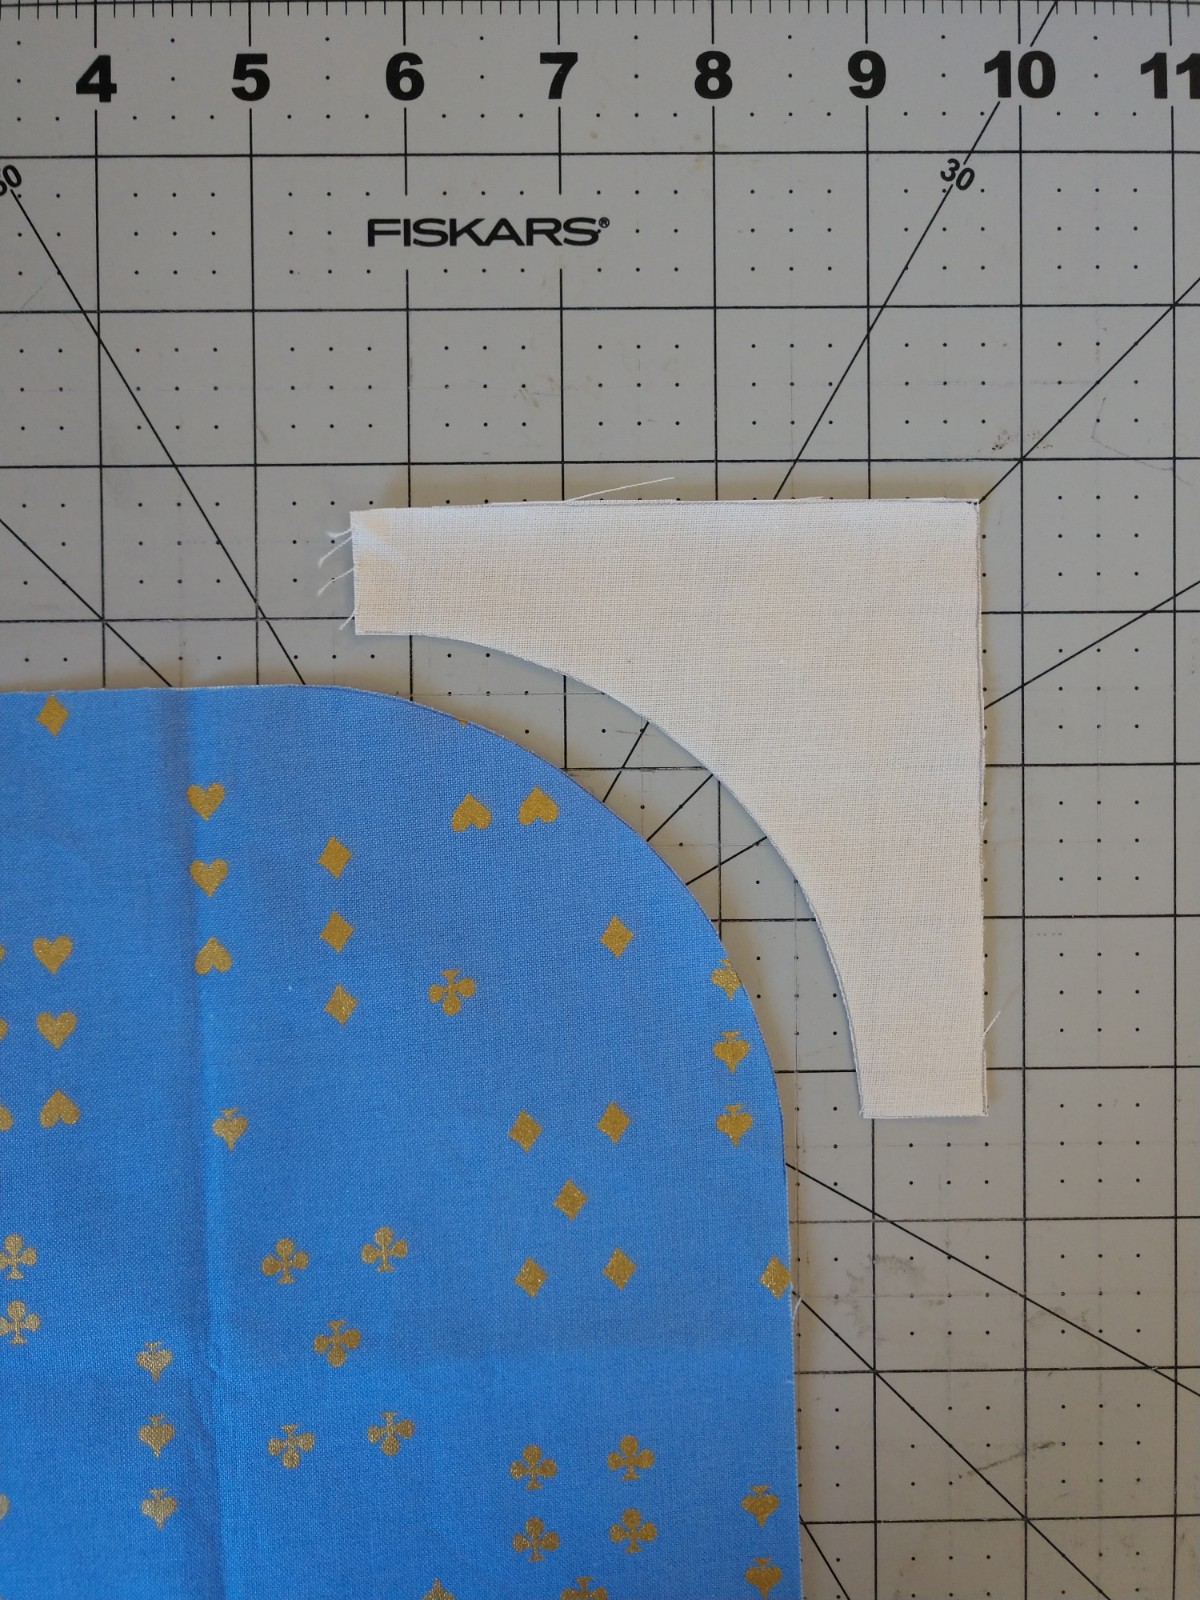
- Pin Pieces A and B right sides together with the two centers aligned. The arms of Piece B will point away from Piece A.
- Gently maneuver the fabric of Piece B along the curve of Piece A. Place a pin every 1/2″ to 3/4″ along the curve.
- Slowly sew along the curve. Start at one end of Piece B and carefully sew around the raw edge of the curve, removing pins as you come to them. Gently adjust Piece B as you sew to prevent puckers.
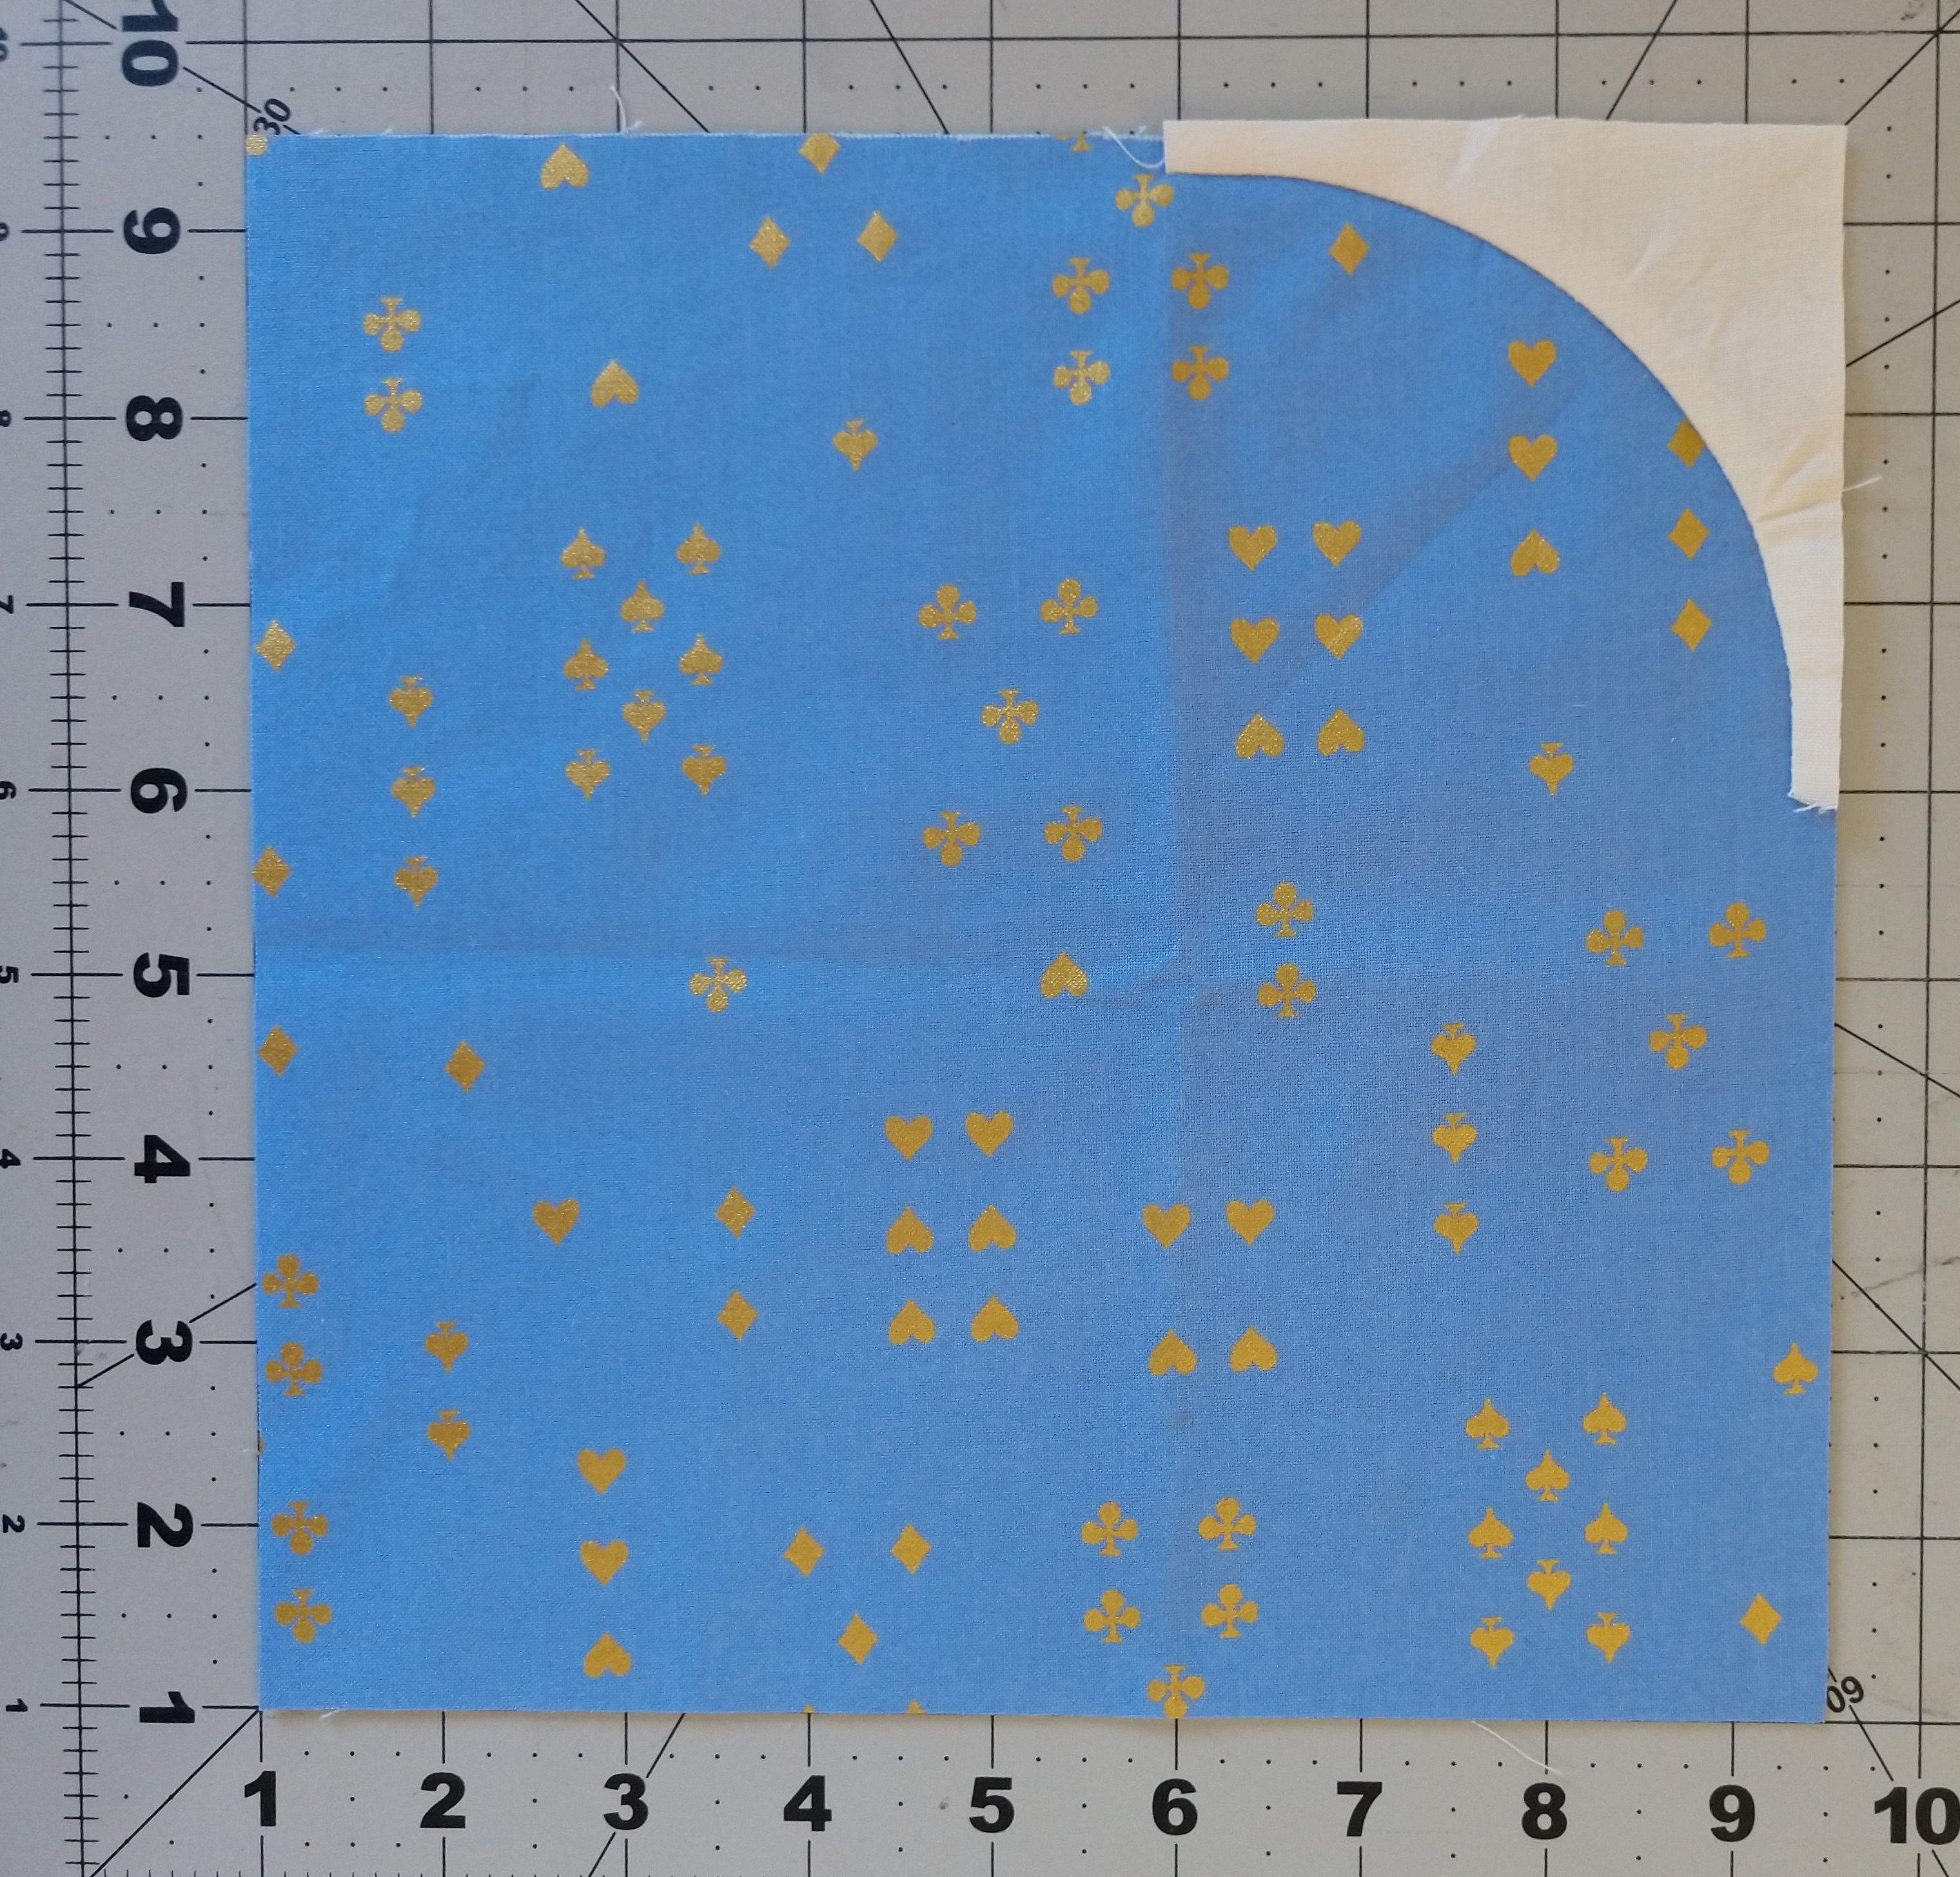
- Press flat with seam towards Piece B.
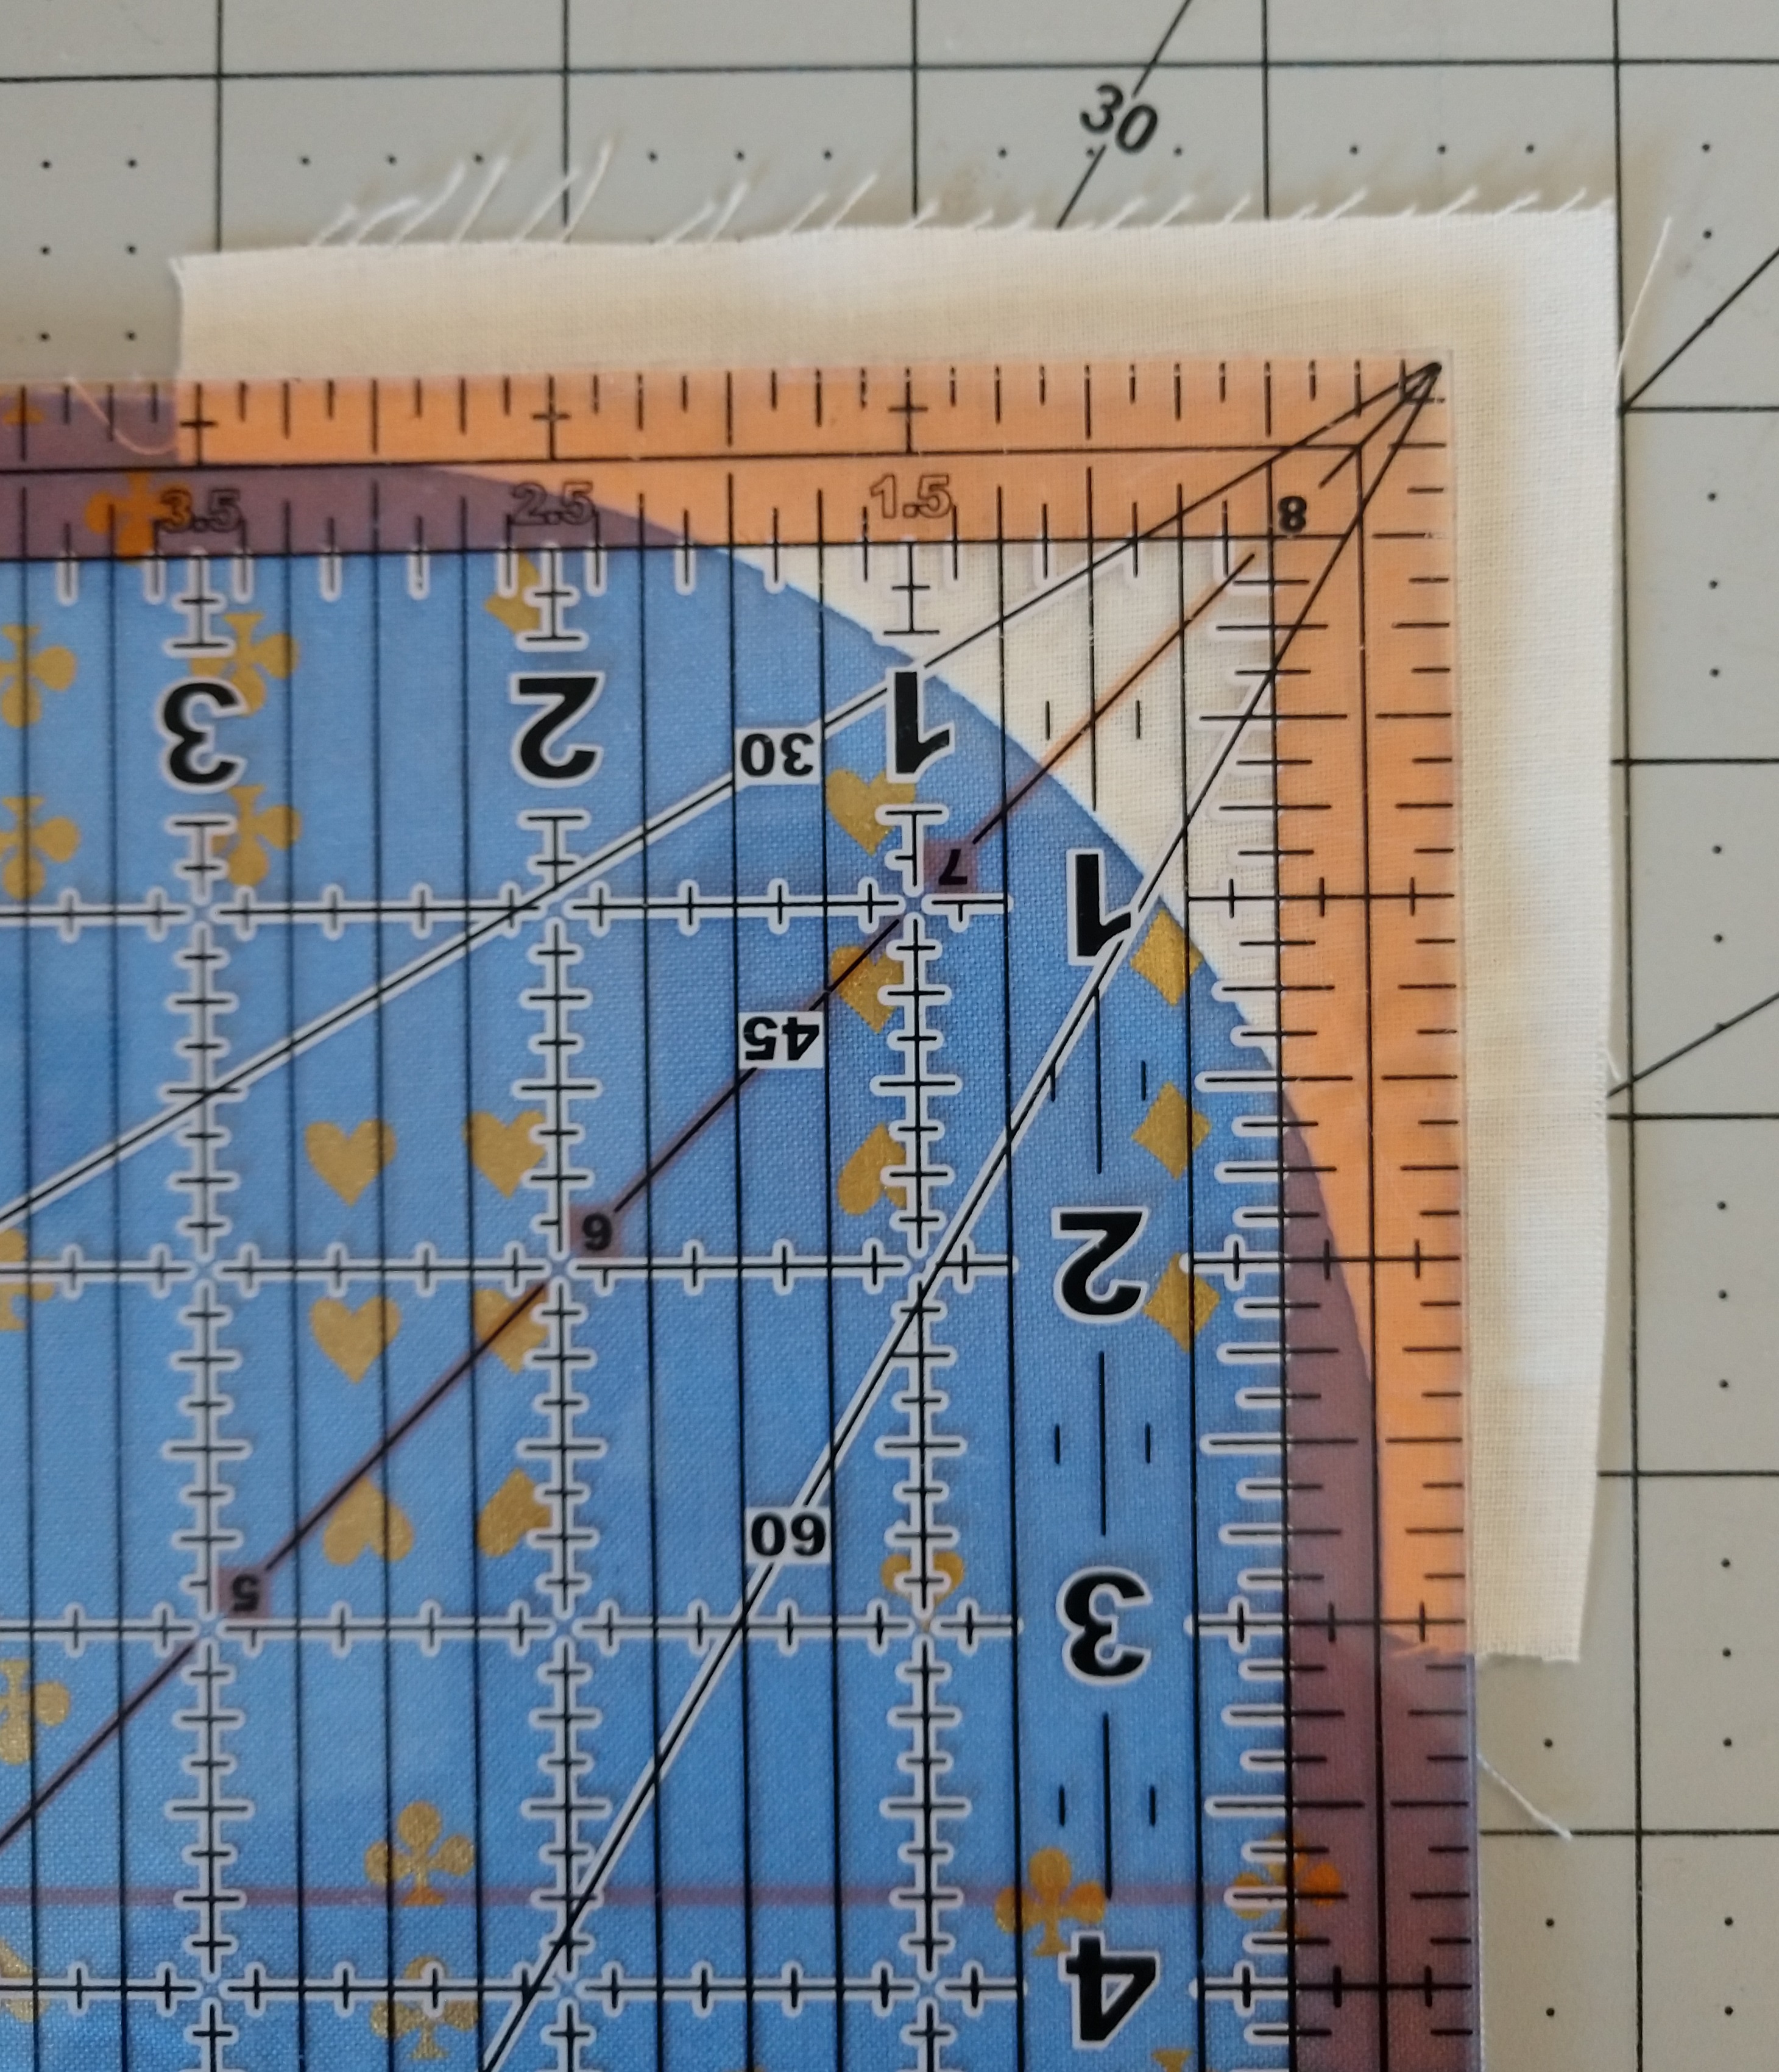
- Trim your block to 8 1/2″ square. Start with the corner of Piece B and use a square ruler if possible. Find the marks 1⁄4” from the edge of your ruler. Align those 1⁄4” marks with the end of the seam between Pieces A and B. Repeat with the other end of the seam. Then trim the opposite corner so the square is 8 1/2″.


Piecing Curves with Glue
To use glue instead of pins, follow the same steps above for using pins, however steps 3 and 4 are a little different.
You can use any kind of washable school glue, however for curves, I like to use a glue stick. I like that the glue is more tacky and dries faster than glue out of a bottle. You can experiment with different types of glue to see what works best for you. But for the sake of this tutorial, I used a glue stick.
- Cut out your pieces. Piece A will be a 9″ square and Piece B can be cut out of a scrap that is at least 4″x3″. You can use the template provided in the pattern in the pattern, OR make your own template!
- Find the center of both pieces by folding both Pieces A and B in half. Use your finger to press and make a crease at the raw edge to mark the center.
- GLUE Pieces A and B right sides together:
Make a small mark inside the seam allowance to mark will Piece B will stop and start. Apply a line of glue inside of the seam allowance. Again, you can use a glue stick, or glue out of a bottle, just make sure it is washable, and spread it thin. - Gently maneuver piece B along the curve of Piece A. Press with your finger to make sure Piece B sticks to the glue. Set the glue with a hot, dry iron.
- Slowly sew along the curve. Start at one end of Piece B and carefully sew around the raw edge of the curve.
- Press flat with seam towards Piece B.
- Trim your block to 8 1/2″ square. Start with the corner of Piece B and use a square ruler if possible. Find the marks 1⁄4” from the edge of your ruler. Align those 1⁄4” marks with the end of the seam between Pieces A and B. Repeat with the other end of the seam. Then trim the opposite corner so the square is 8 1/2″.


Below are more versions of this Little Tumble Baby Quilt made by my awesome testers! They were SO helpful and gave me some great suggestions. They were also very sneaky & did a fantastic job of keeping this little pattern a secret until today!
You can purchase the full pattern HERE.


Made by Jennifer Logan-Lorenz (@jloganlorenz).
The bright blue background is SO CUTE!!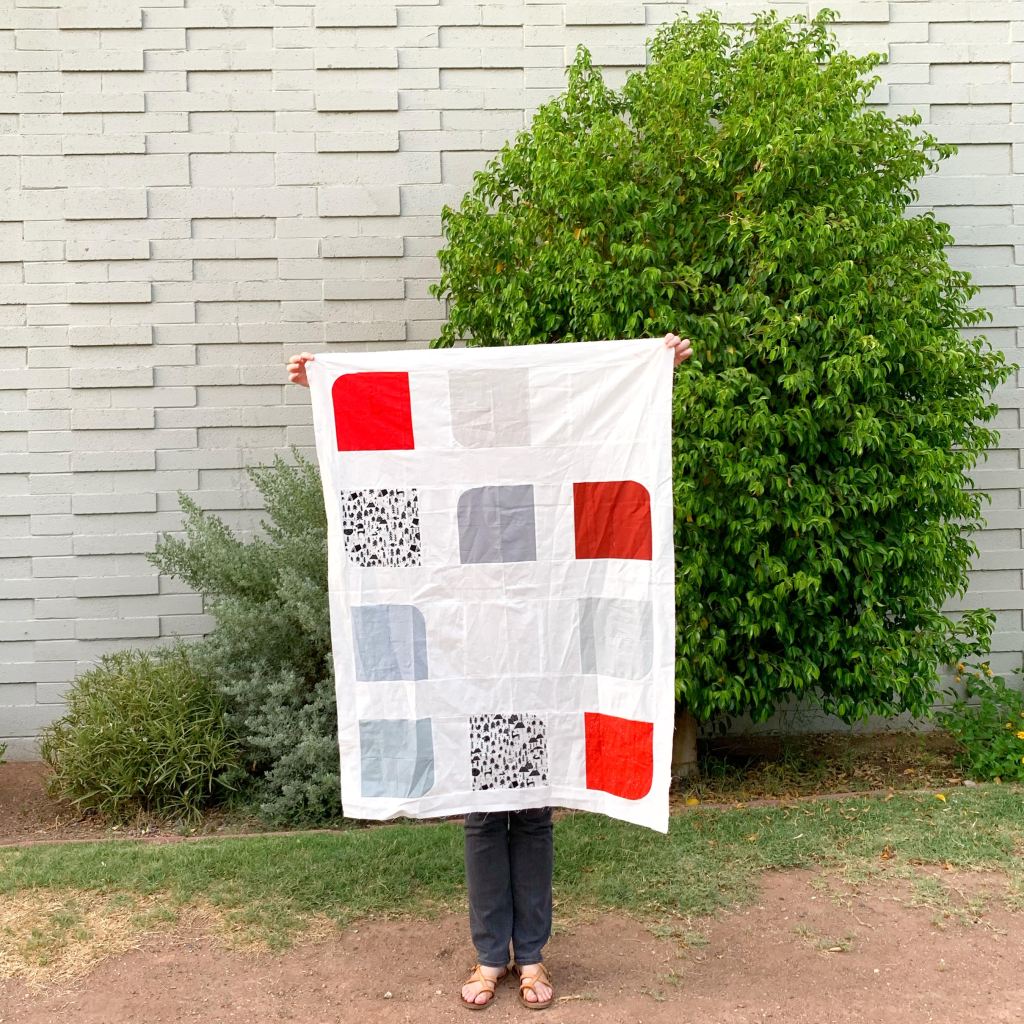
I absolutely love the pops of red!
Made by Jenni Wingenroth (@nolliebean).


Thank you again for taking the time to visit my blog & read about my latest pattern! It’s quick and fun, and a great way to try curves for the first time. I can’t wait to see what you make, and please use the hashtags #aprilgracequilts and #littletumblebabyquilt so I can follow along!
All three of my PDF quilt patterns can be found HERE.
Happy sewing!

Lovely quilt! Thanks so much for the tutorial.
LikeLike
Awww, I love Little Tumble and the inspiration behind it is so sweet. Thanks for the great tutorial on the block too. I love curves and yours is so subtle that it’s perfect for anyone to try. Thanks for the great post and joining the hop!
LikeLike
I have to admit I’ve never sewn a block with a curve. That may change after seeing this cute pattern and all the little curves. Thanks for showing two ways to do it…big help! Thanks for sharing your sweet quilt!
LikeLiked by 1 person
Cute quilt, thanks so much for sharing the tutorial
LikeLiked by 1 person
I am loving the idea of using glue instead of pins. What a great idea! These are just too cute, I am definitely going to have to give it a try! Thanks.
LikeLike
This would be a wonderful quilt where you need a quick finish or to use up some scraps. thank you for the inspiration.
LikeLiked by 1 person
NEAT INSTRUCTIONS FOR A PRETTY BLOCK! THANKS FOR SHARING!!!!
LikeLiked by 1 person
Awesome quilts, all. Thanks for sharing with the Hop! That NO PIN version looks interesting. MUST try!!
LikeLiked by 1 person
What a cool block and a great project with the how to’s on doing it. Great project and thank you for sharing it with us today.
LikeLiked by 1 person
Those are cute and different!
LikeLiked by 1 person
I am another “never have sewed a curved block” person. Maybe I’ll dip my toe in the water. I enjoyed your tutorial and seeing the fun and modern results of these baby quilts!
LikeLiked by 1 person
Very cute quilt. Thanks for the how to make … 🙂 Pat
LikeLiked by 1 person
Cute quilt. I love piecing curves.
LikeLiked by 1 person
Your tumbler blocks really do make a striking baby quilt! Very unique and a perfect way to show off favorite fabrics!
LikeLiked by 1 person
Cute quilt and great way to show off favorite fabrics. Thanks for sharing!
LikeLike
I really love the block and the pattern. Already on my Etsy favorites list.
LikeLike
Cute idea based on a sweet story. Fun!
LikeLike
How cute is that quilt! Love the way you made the block, must try it! Thanks for sharing! xx
LikeLike
Lovely quilt. I just started to use the glue method for my quilting in general. Thanks so much for the block construction guidlines.
LikeLike
Thanks for the great curves tutorial!
LikeLike
What a sweet little quilt! Thanks for the tutorial and all of the fun examples.
LikeLike
That is such a cute quilt! Thanks for sharing your tutorial. I like to use Roxanne’s Glue Baste It when doing my binding. I think it would work great for curved piecing also!
LikeLike
Interest block – the curve adds just enough pop! I like it!
LikeLike
Thank you so much! 🤗
LikeLike
That’s a fun modern block!
LikeLike